
今回の記事は SDXL 1.0 向けの T2I-Adapter です。
SDXL はメモリ消費量が多い分、やっぱり高品質ですね。
ControlNet のときにはやらなかったけど、T2I-Adapter は SDXL 版を試してみました。
- はじめに
- Canny Adapter (SDXL)
- Sketch Adapter (SDXL)
- Lineart Adapter (SDXL)
- Openpose Adapter (SDXL)
- Depth-midas Adapter (SDXL)
- Depth-zoe Adapter (SDXL)
- まとめ
はじめに
SD 1.4, SD 1.5 向けの T2I-Adapter は以下の記事で使ってみました。
Canny Adapter (SDXL)
スクリプト全体
スクリプト全体 (折りたたみ)
Adapter, Pipeline 等のロード
import torch
from controlnet_aux import CannyDetector
from diffusers import StableDiffusionXLAdapterPipeline, T2IAdapter, EulerAncestralDiscreteScheduler, AutoencoderKL

# アダプターの準備
adapter = T2IAdapter.from_pretrained(
    "TencentARC/t2i-adapter-canny-sdxl-1.0",
    torch_dtype=torch.float16,
    varient="fp16"
).to("cuda")

# スケジューラーの準備
euler_a = EulerAncestralDiscreteScheduler.from_pretrained(
    "stabilityai/stable-diffusion-xl-base-1.0",
    subfolder="scheduler"
)

# VAE の準備
vae=AutoencoderKL.from_pretrained(
    "madebyollin/sdxl-vae-fp16-fix",
    torch_dtype=torch.float16
)

# パイプラインの準備
pipe = StableDiffusionXLAdapterPipeline.from_pretrained(
   "stabilityai/stable-diffusion-xl-base-1.0",
   vae=vae,
   adapter=adapter,
   scheduler=euler_a,
   torch_dtype=torch.float16,
   variant="fp16",
).to("cuda")

# Detector の準備
detector = CannyDetector()
投入画像の準備
from diffusers.utils import load_image

# 元画像
init_image_url = "https://huggingface.co/Adapter/t2iadapter/resolve/main/figs_SDXLV1.0/org_canny.jpg"
init_image = load_image(init_image_url)

# Canny エッジ画像
canny_image = detector(init_image, detect_resolution=384, image_resolution=1024)#.resize((1024, 1024))
パイプラインの実行
from diffusers.utils import make_image_grid

# パイプラインの実行
prompt = "Mystical fairy in real, magic, 4k picture, high quality"
negative_prompt = "extra digit, fewer digits, cropped, worst quality, low quality, glitch, deformed, mutated, ugly, disfigured"
image = pipe(
  prompt=prompt,
  negative_prompt=negative_prompt,
  image=canny_image,
  num_inference_steps=30,
  guidance_scale=7.5,
  adapter_conditioning_scale=0.8,
  adapter_conditioning_factor=1
).images[0]

# 実行結果
make_image_grid([init_image, canny_image, image], rows=1, cols=3)
いつもメソッド作ってたけど Canny にも Detector あったのね~
実行結果


Sketch Adapter (SDXL)
スクリプト全体
スクリプト全体 (折りたたみ)
Adapter, Pipeline 等のロード
import torch
from controlnet_aux import PidiNetDetector
from diffusers import StableDiffusionXLAdapterPipeline, T2IAdapter, EulerAncestralDiscreteScheduler, AutoencoderKL


# アダプターの準備
adapter = T2IAdapter.from_pretrained(
  "TencentARC/t2i-adapter-sketch-sdxl-1.0",
  torch_dtype=torch.float16, varient="fp16"
).to("cuda")

# VAE の準備
vae = AutoencoderKL.from_pretrained(
    "madebyollin/sdxl-vae-fp16-fix",
    torch_dtype=torch.float16
)

# パイプラインの準備
pipe = StableDiffusionXLAdapterPipeline.from_pretrained(
    "stabilityai/stable-diffusion-xl-base-1.0",
    vae=vae,
    adapter=adapter,
    torch_dtype=torch.float16,
    variant="fp16",
).to("cuda")

# スケジューラの設定
pipe.scheduler = EulerAncestralDiscreteScheduler.from_config(pipe.scheduler.config)

# Detector の準備
detector = PidiNetDetector.from_pretrained("lllyasviel/Annotators").to("cuda")
投入画像の準備
from diffusers.utils import load_image

# 元画像
init_image_url = "https://huggingface.co/Adapter/t2iadapter/resolve/main/figs_SDXLV1.0/org_sketch.png"
init_image = load_image(init_image_url)

# Sketch 画像
sketch_image = detector(init_image, detect_resolution=1024, image_resolution=1024, apply_filter=True)
パイプラインの実行
from diffusers.utils import make_image_grid

# パイプラインの実行
prompt = "a robot, mount fuji in the background, 4k photo, highly detailed"
negative_prompt = "extra digit, fewer digits, cropped, worst quality, low quality, glitch, deformed, mutated, ugly, disfigured"
image = pipe(
    prompt=prompt,
    negative_prompt=negative_prompt,
    image=sketch_image,
    num_inference_steps=30,
    adapter_conditioning_scale=0.9,
    guidance_scale=7.5,
).images[0]

# 実行結果
make_image_grid([init_image, sketch_image, image], rows=1, cols=3)
実行結果


Lineart Adapter (SDXL)
スクリプト全体
スクリプト全体 (折りたたみ)
Adapter, Pipeline 等のロード
import torch
from controlnet_aux import LineartDetector
from diffusers import StableDiffusionXLAdapterPipeline, T2IAdapter, EulerAncestralDiscreteScheduler, AutoencoderKL

# アダプターの準備
adapter = T2IAdapter.from_pretrained(
  "TencentARC/t2i-adapter-lineart-sdxl-1.0",
  torch_dtype=torch.float16,
  varient="fp16"
).to("cuda")

# スケジューラの準備
euler_a = EulerAncestralDiscreteScheduler.from_pretrained(
    "stabilityai/stable-diffusion-xl-base-1.0",
    subfolder="scheduler"
)

# VAE の準備
vae = AutoencoderKL.from_pretrained(
    "madebyollin/sdxl-vae-fp16-fix",
    torch_dtype=torch.float16
)

# パイプラインの準備
pipe = StableDiffusionXLAdapterPipeline.from_pretrained(
    "stabilityai/stable-diffusion-xl-base-1.0",
    vae=vae,
    adapter=adapter,
    scheduler=euler_a,
    torch_dtype=torch.float16,
    variant="fp16",
).to("cuda")

# Detector の準備
detector = LineartDetector.from_pretrained("lllyasviel/Annotators").to("cuda")
投入画像の準備
from diffusers.utils import load_image

# 元画像
init_image_url = "https://huggingface.co/Adapter/t2iadapter/resolve/main/figs_SDXLV1.0/org_lin.jpg"
init_image = load_image(init_image_url)

# LineArt 画像
lineart_image = detector(init_image, detect_resolution=384, image_resolution=1024)
パイプラインの実行
from diffusers.utils import make_image_grid
# プロンプトの実行
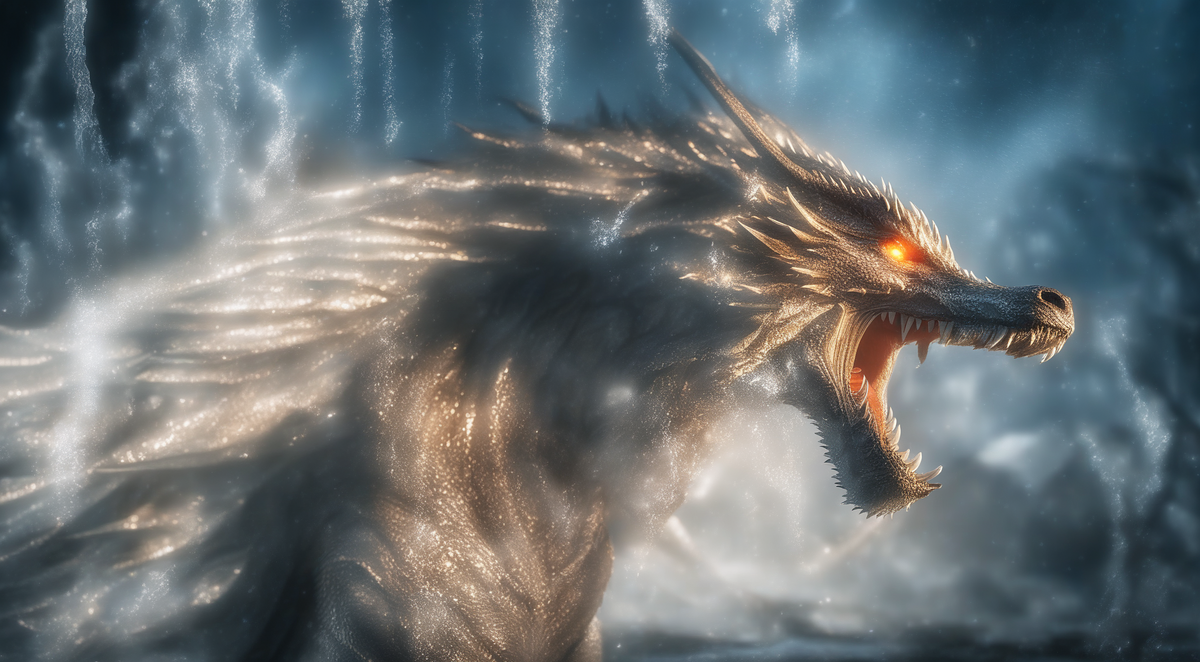
prompt = "Ice dragon roar, 4k photo"
negative_prompt = "anime, cartoon, graphic, text, painting, crayon, graphite, abstract, glitch, deformed, mutated, ugly, disfigured"
image = pipe(
prompt=prompt,
negative_prompt=negative_prompt,
image=lineart_image,
num_inference_steps=30,
adapter_conditioning_scale=0.8,
guidance_scale=7.5,
).images[0]
# 実行結果
make_image_grid([init_image, lineart_image, image], rows=1, cols=3)
実行結果
Openpose Adapter (SDXL)
スクリプト全体
スクリプト全体 (折りたたみ)
Adapter, Pipeline 等のロード
import torch
from controlnet_aux import OpenposeDetector
from diffusers import StableDiffusionXLAdapterPipeline, T2IAdapter, EulerAncestralDiscreteScheduler, AutoencoderKL

# アダプターの準備
adapter = T2IAdapter.from_pretrained(
  "TencentARC/t2i-adapter-openpose-sdxl-1.0",
  torch_dtype=torch.float16
).to("cuda")

# VAE の準備
vae = AutoencoderKL.from_pretrained(
    "madebyollin/sdxl-vae-fp16-fix",
    torch_dtype=torch.float16
)

# パイプラインの準備
pipe = StableDiffusionXLAdapterPipeline.from_pretrained(
    "stabilityai/stable-diffusion-xl-base-1.0",
    vae=vae,
    adapter=adapter,
    torch_dtype=torch.float16,
    variant="fp16"
).to("cuda")

# スケジューラの設定
pipe.scheduler = EulerAncestralDiscreteScheduler.from_config(pipe.scheduler.config)

# Detector の準備
detector = OpenposeDetector.from_pretrained("lllyasviel/Annotators")
投入画像の準備
import numpy as np
from diffusers.utils import load_image
from PIL import Image

# 元画像
init_image_url = "https://huggingface.co/Adapter/t2iadapter/resolve/main/people.jpg"
init_image = load_image(init_image_url)

# OpenPose 画像
openpose_image = detector(init_image, detect_resolution=512, image_resolution=1024)
openpose_image = np.array(openpose_image)[:, :, ::-1]
openpose_image = Image.fromarray(np.uint8(openpose_image))
パイプラインの実行
from diffusers.utils import make_image_grid

# パイプラインの実行
prompt = "A couple, 4k photo, highly detailed"
negative_prompt = "anime, cartoon, graphic, text, painting, crayon, graphite, abstract, glitch, deformed, mutated, ugly, disfigured"
image = pipe(
  prompt=prompt,
  negative_prompt=negative_prompt,
  image=openpose_image,
  num_inference_steps=30,
  adapter_conditioning_scale=1,
  guidance_scale=7.5,
).images[0]

# 実行結果
make_image_grid([init_image, openpose_image, image], rows=1, cols=3)
実行結果


Depth-midas Adapter (SDXL)
スクリプト全体
スクリプト全体 (折りたたみ)
Adapter, Pipeline 等のロード
import torch
from controlnet_aux import MidasDetector
from diffusers import StableDiffusionXLAdapterPipeline, T2IAdapter, EulerAncestralDiscreteScheduler, AutoencoderKL

# アダプターの準備
adapter = T2IAdapter.from_pretrained(
  "TencentARC/t2i-adapter-depth-midas-sdxl-1.0",
  torch_dtype=torch.float16,
  varient="fp16"
).to("cuda")

# スケジューラの準備
euler_a = EulerAncestralDiscreteScheduler.from_pretrained(
    "stabilityai/stable-diffusion-xl-base-1.0",
    subfolder="scheduler"
)

# VAE の準備
vae = AutoencoderKL.from_pretrained(
    "madebyollin/sdxl-vae-fp16-fix",
    torch_dtype=torch.float16
)

# パイプラインの準備
pipe = StableDiffusionXLAdapterPipeline.from_pretrained(
    "stabilityai/stable-diffusion-xl-base-1.0",
    vae=vae,
    adapter=adapter,
    scheduler=euler_a,
    torch_dtype=torch.float16,
    variant="fp16"
).to("cuda")

# Detector の準備
detector = MidasDetector.from_pretrained(
  "valhalla/t2iadapter-aux-models",
  filename="dpt_large_384.pt",
  model_type="dpt_large"
).to("cuda")
投入画像の準備
from diffusers.utils import load_image

# 元画像
init_image_url = "https://huggingface.co/Adapter/t2iadapter/resolve/main/figs_SDXLV1.0/org_mid.jpg"
init_image = load_image(init_image_url)

# MidasDepth 画像
midas_depth_image = detector(init_image, detect_resolution=512, image_resolution=1024)
パイプラインの実行
from diffusers.utils import make_image_grid

# パイプラインの実行
prompt = "A photo of a room, 4k photo, highly detailed"
negative_prompt = "anime, cartoon, graphic, text, painting, crayon, graphite, abstract, glitch, deformed, mutated, ugly, disfigured"
image = pipe(
  prompt=prompt,
  negative_prompt=negative_prompt,
  image=midas_depth_image,
  num_inference_steps=30,
  adapter_conditioning_scale=1,
  guidance_scale=7.5,
).images[0]

# 実行結果
make_image_grid([init_image, midas_depth_image, image], rows=1, cols=3)
実行結果


Depth-zoe Adapter (SDXL)
RuntimeError: Error(s) in loading state_dict for ZoeDepthNK:
うーん。Zoe Depth は SD 1.5 同様、やっぱりダメです。
まとめ
ControlNet とほとんど同じですが、
アプローチの1つとして、T2I-Adapter も触ってみました。